Yashica 124 Manual: A Comprehensive Guide
Welcome to the comprehensive guide for the Yashica 124! This resource provides essential information for both new and experienced users, helping you unlock the full potential of this classic twin-lens reflex camera. This guide offers valuable insights for optimal usage.
The Yashica 124 and its successor, the 124 G, stand as iconic twin-lens reflex (TLR) cameras, celebrated for their robust build and exceptional image quality. These cameras, reminiscent of the revered Rolleiflex, offer an accessible entry point into medium format photography.
Primarily designed for 120 film, yielding 6×6 cm square negatives, the Yashica 124 series provides a distinct aesthetic cherished by film enthusiasts. The Yashica Mat 124 cameras have a fixed lens. Featuring a coupled exposure meter, the Yashica 124 assists photographers in achieving accurate exposures, though battery considerations are vital. The camera’s Copal-SV shutter ensures reliability across a range of shutter speeds.
Understanding the camera’s features, from film loading to focusing techniques, empowers users to create stunning images. This guide aims to provide a thorough overview, enabling both novices and seasoned photographers to fully appreciate the Yashica 124’s capabilities and produce remarkable photographs, capturing the essence of classic film photography.
Understanding the Camera’s Parts and Controls
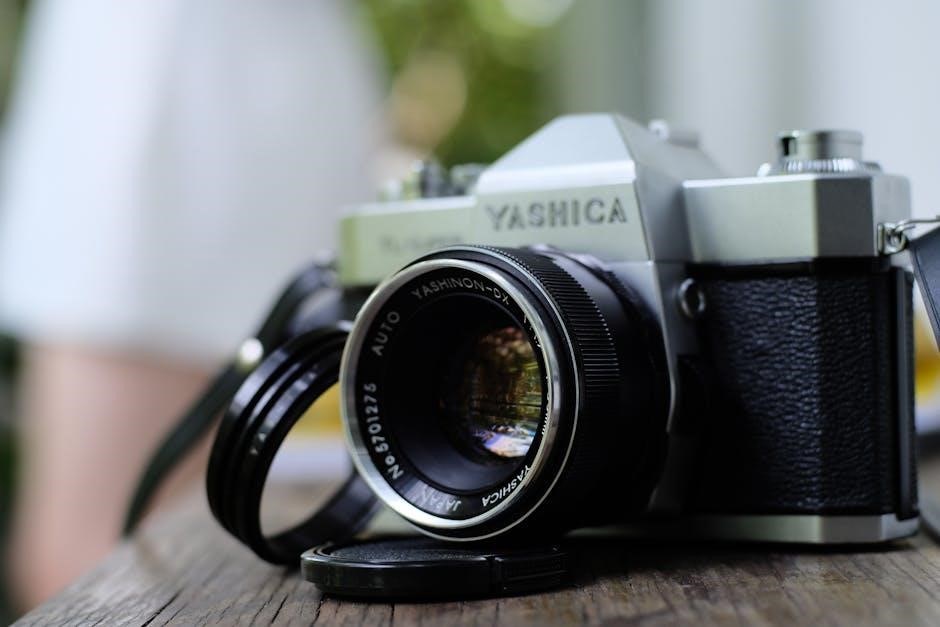
To effectively use the Yashica 124, familiarity with its components is essential. The camera features two lenses: a viewing lens on top for composing the shot and a taking lens below for capturing the image.
The focusing knob, typically located on the side, adjusts the focus by moving the lens board. The aperture and shutter speed dials are usually found on the taking lens, allowing for manual exposure control. The film advance crank advances the film and cocks the shutter.
The exposure meter, powered by a battery, aids in determining correct exposure settings; the ASA/ISO dial must be set accordingly. The camera also includes a frame counter to indicate the number of exposures taken. The shutter release button activates the shutter, capturing the photograph. Understanding these parts ensures confident and creative use of the Yashica 124, enabling photographers to master its capabilities and achieve desired results.

Loading 120 Film into the Yashica 124
Loading 120 film into the Yashica 124 requires a few precise steps. First, open the camera back by releasing the latch, usually found on the side or bottom of the camera. Next, insert a fresh roll of 120 film into the supply side, ensuring the film is oriented correctly with the paper backing facing outward.
Thread the film’s paper leader across the film plane and attach it to the take-up spool on the opposite side. Advance the film using the film advance crank until the start mark on the paper backing aligns with the indicator mark inside the camera.
Close the camera back securely. Continue advancing the film until the frame counter displays “1,” indicating the first exposure is ready. Ensure the film is taut and feeding smoothly; Always load film in subdued light to prevent accidental exposure.
Double-check that the camera back is properly latched to avoid light leaks. With these steps, your Yashica 124 is ready to capture stunning medium format images.
Setting the Film Speed (ASA/ISO)
Setting the correct film speed (ASA/ISO) on your Yashica 124 is crucial for proper exposure. Locate the ASA/ISO dial, typically found around the lens or on the camera body. Refer to the film packaging to determine the ASA/ISO rating of your film.
Adjust the dial to match the film’s ASA/ISO value. For example, if you’re using ISO 400 film, set the dial to 400. This setting informs the camera’s light meter how sensitive the film is to light, ensuring accurate exposure readings.
Incorrectly setting the film speed can result in overexposed or underexposed images. Always double-check the ASA/ISO setting before shooting, especially when switching between different film types. Some Yashica 124 models might use a coupled meter, where the ASA/ISO setting directly affects the meter reading.
Consult your camera’s manual for the specific location and operation of the ASA/ISO dial, as variations may exist between models. Proper film speed setting is key to achieving well-exposed and beautiful photographs.
Focusing Techniques for Sharp Images
Achieving sharp images with your Yashica 124 relies heavily on precise focusing techniques. The Yashica 124 is a twin-lens reflex (TLR) camera, meaning it uses two lenses: one for viewing and focusing, and another for taking the picture.
To focus, look through the viewing lens and adjust the focusing knob, typically located on the side of the camera. As you turn the knob, you’ll see the image in the viewfinder become sharper or blurrier. The goal is to achieve the clearest possible image in the viewfinder before taking the shot.
The viewfinder usually features a ground glass screen, sometimes with a central focusing aid like a split-image or microprism collar. These aids help you identify the point of sharpest focus. Pay close attention to fine details in your subject as you adjust the focus.
Practice makes perfect! With time, you’ll develop a feel for the focusing mechanism and be able to quickly and accurately focus your Yashica 124, ensuring your photos are sharp and detailed. Remember to hold the camera steady during focusing to avoid blur.
Using the Exposure Meter (and Battery Considerations)
The Yashica 124 often features a built-in exposure meter, a handy tool for determining the correct aperture and shutter speed for a well-exposed photograph. Understanding how to use this meter is crucial for achieving optimal results.
To activate the meter, you’ll typically find a switch or button on the camera body. Once activated, the meter reads the light reflecting off your subject and provides a reading, usually displayed via a needle within the viewfinder or on the camera’s exterior.
The meter reading indicates the recommended combination of aperture and shutter speed for proper exposure. You’ll then manually set these values on the camera.
Many Yashica 124 cameras originally used mercury batteries, which are now discontinued due to environmental concerns. Modern alkaline or silver oxide batteries can be used as replacements, but they often provide a slightly different voltage. This voltage difference can affect the accuracy of the exposure meter.
Using an adapter or adjusting your ISO settings can help compensate for this difference. Alternatively, you can use an external handheld light meter for more precise exposure readings. Always check your battery’s condition for accurate readings.
Understanding Shutter Speeds and Aperture Settings
Shutter speed and aperture are two fundamental elements that control the amount of light reaching the film in your Yashica 124. Mastering these settings is essential for creative and technically sound photography.
Shutter speed refers to the duration the camera’s shutter remains open, exposing the film to light. Measured in seconds or fractions of a second (e.g., 1/500s, 1/60s, 1s), faster shutter speeds freeze motion, while slower speeds allow more light in and can create motion blur.
Aperture, on the other hand, controls the size of the lens opening through which light passes. It’s expressed as an f-number (e.g., f/2.8, f/8, f/16). A wider aperture (smaller f-number) lets in more light, creating a shallow depth of field (blurred background). A smaller aperture (larger f-number) allows less light, resulting in a greater depth of field (sharper background).
The interplay between shutter speed and aperture is crucial for achieving the desired exposure. For example, in bright sunlight, you might use a fast shutter speed and a smaller aperture, while in low light, a slower shutter speed and a wider aperture might be necessary. Experimenting with these settings will help you understand their effects on your images.
Taking a Metered Reading and Setting Exposure
Accurate exposure is key to capturing well-balanced images with your Yashica 124. This involves taking a metered reading of the scene and then adjusting your camera settings accordingly.
The Yashica 124 features a built-in light meter, which helps determine the optimal exposure. To take a reading, first, set the film speed (ASA/ISO) on the camera. Then, point the camera at your subject and observe the meter needle.
The meter needle indicates the suggested combination of shutter speed and aperture for proper exposure. You can adjust either the shutter speed or the aperture, and the meter needle will move accordingly, showing you equivalent exposure settings.
For instance, if the meter suggests 1/125s at f/8, you could also use 1/60s at f/11 or 1/250s at f/5.6 for a similar exposure. Choose the settings that best suit your creative vision, considering depth of field and motion blur.
In challenging lighting situations, you may need to compensate for the meter’s reading. For example, when shooting a bright subject against a dark background, the meter might underexpose the subject. In such cases, you can manually adjust the exposure settings to overexpose the image slightly.
Working with Different Lighting Conditions
Mastering the Yashica 124 involves understanding how to adapt to various lighting scenarios. Each lighting condition presents unique challenges and opportunities for creative expression.
In bright sunlight, the high intensity can lead to overexposure. Use a smaller aperture (higher f-number) or a faster shutter speed to compensate. Consider using a neutral density (ND) filter to further reduce the amount of light entering the lens, allowing for wider apertures or slower shutter speeds.
Overcast days provide soft, diffused light, ideal for portraits and minimizing harsh shadows. However, the lower light levels may require wider apertures or slower shutter speeds. Use a tripod to prevent camera shake when shooting at slower speeds.
Indoor lighting often presents a warm color cast. Adjust your white balance accordingly or embrace the warmth for a particular mood. Use a wider aperture or a higher ISO setting to capture sufficient light.
When shooting at night, use a tripod and a slow shutter speed to capture enough light. Be mindful of light sources in the frame, as they can create interesting effects. Consider using a cable release to minimize camera shake during long exposures.
Troubleshooting Common Issues
Even with careful handling, the Yashica 124 can encounter occasional issues. Addressing these problems promptly can prevent further damage and ensure reliable performance.
A common issue is a malfunctioning light meter. This can often be traced to a dead battery or corroded contacts. Replace the battery with a compatible type and clean the contacts with a cotton swab and isopropyl alcohol.
If your images are consistently overexposed or underexposed, double-check your exposure settings and ensure the film speed is set correctly. A faulty meter may require professional repair.
Film loading errors can lead to blank frames or overlapping images. Ensure the film is properly loaded and advanced according to the camera’s instructions. Check the film advance mechanism for any obstructions.
A sticky shutter can cause blurry images or inconsistent exposures. Try exercising the shutter by repeatedly firing it at different speeds. If the problem persists, a professional cleaning and lubrication may be necessary.
Dust and debris can accumulate on the lens and viewfinder, affecting image quality. Use a soft brush or lens cloth to gently clean these surfaces.
Maintenance and Care Tips
Proper maintenance is crucial for prolonging the life of your Yashica 124. Regular cleaning and careful handling will keep it in optimal working condition.
After each use, gently wipe the camera body with a soft, dry cloth to remove dust and fingerprints. Use a lens cleaning solution and a microfiber cloth to clean the lenses, avoiding harsh chemicals.
Store the camera in a cool, dry place, away from direct sunlight and extreme temperatures. A camera bag or case provides additional protection against dust and impacts.
Periodically check the battery compartment for corrosion. Remove the battery if you plan to store the camera for an extended period.
Inspect the light seals around the film door and replace them if they become brittle or deteriorated. Leaky light seals can cause light leaks on your film.
Have the camera professionally serviced every few years to ensure all mechanical parts are properly lubricated and functioning correctly. This will help prevent costly repairs in the future.
Accessing and Utilizing the Yashica 124 Manual (PDF Downloads)
The original Yashica 124 manual is an invaluable resource for understanding every feature and function of your camera. Fortunately, digital versions of the manual are readily available online as PDF downloads. These digital manuals offer a convenient way to access detailed instructions, diagrams, and troubleshooting tips.
Numerous websites offer free PDF downloads of the Yashica 124 and Yashica 124G manuals. A simple online search will lead you to several reputable sources.
Once you’ve downloaded the PDF, take the time to familiarize yourself with its contents. Pay close attention to sections covering camera settings, exposure control, and film loading.
The manual can be especially helpful when troubleshooting issues or learning advanced techniques. Keep a copy on your smartphone or tablet for easy access in the field.
Utilize the manual’s diagrams to understand the location and function of each camera part. Refer to the exposure charts for guidance in different lighting conditions.
By accessing and utilizing the Yashica 124 manual, you’ll be well-equipped to maximize your camera’s performance and capture stunning images.